
Mix Ratio & Materials


Mix Ratio
MATERIALS MUST BE CLAY AND ORGANIC FREE!
If sand is too coarse add 10% fine sand.
Do not use fine or coarse sand only!
Quarry dust or run may be used instead of sand.
To build legally with Stumbelbloc or to sell them, manufactured blocks must have a SABS approved and tested certificate of block strength.
Contact Stumbelbloc for testing procedure!
Products


Stumbelbloc was invented to give anyone with limited skills and limited means the opportunity to build their own home in a cost effective way.
The interlocking building blocks are made with the unique and innovative Stumbelbloc plastic moulds, which are filled with a concrete mix and left to dry. When removed from the mould, a very accurate hollow core block is created. The unique interlocking shape allows building with great ease and, in conjunction with the glue i.e. thin bed mortar and render (NHBRC approved building method), a very strong, fast and cheap construction method is created.
The material cost for making a standard block is between R 6, 00 and R 8, 00. A significant consideration is the saving on the cost of transport of normal blocks at R 3, 00 per 100 km. The additional labour cost varies from area to area. Stumbelbloc can be manufactured on site thereby saving money and creating work on site.
SABS block strength requirement is 4 MPa per block. The standard block has been tested around 4, 8 MPa. Materials can be varied in accordance with local requirements and the strength required.
An average unskilled labourer can make up to 60 blocks a day using the traditional hand mixing method. With some basic tools and power a small production unit employing four labourers per day can manufacture up to 250 blocks per day.
Stumbelbloc creates employment for a single person and selling his own blocks for a cost of R 15 317,54 per person for the moulds. This is based on 60 moulds, with one person making 30 blocks per day, by hand. In South Africa, the material cost is between R 6, 00 to R 8, 00 per block which could then be sold in rural areas at R 14, 00 or in urban areas for R 18, 00 per block plus transport cost.
This innovative building system requires no lintels instead the blocks are placed, filled with concrete and rebar creating a Stumbelbloc lintel. A structure can be built to roof height in one day and can take full load bearing immediately.
STUMBELBLOC Instructions to manufacture and de-mould the block
- Block manufacturing should be done in some form of shade and not in direct sunlight. Direct sunlight and extreme variations of temperatures may cause the blocks to crack before they are properly cured.
- Lubricate the entire inner surface of the mould’s two halves using cooking oil or similar. A heavier oil e.g. gearbox oil SAE 80W90 is used for the first usage as recommendation to compensate for oils release from plastic. Method of applying lubrication can be by painting with paint brush, spraying with compressed air, or dipping the mould in its entire into a drum containing the lubrication oil. This step is vital to ensure easy de-moulding. Make sure that ALL internal surfaces and edges of the moulds are coated! Improper coating will result in difficulty to de-mould blocks from moulds.
- Mould to stand up with open side at top.
- Use the bolts, washers, and wing nuts provided to join the two halves (Yellow and Red) of mould together. Ensure that the washers provided are used on both sides to spread the load. Slide the aluminium strips/rails down each side of the joined mould.
- Stand the mould with open side up on a firm surface. Make use of a vibrating table if available. This provides easier filling and avoids the need for tapping the mould with rubber mallets. A simple vibrating table can be constructed using a metal plate mounted to the underside of the table using motor engine mountings (or similar). An electric motor is attached to the underside of table. Any suitable motor will suffice e.g. an old washing machine motor, bench grinder or vibrating motor is ideal. The vibrating action is achieved by attaching custom made arm bush/bolts to shaft of motor and placing motor off centre.
- Fill mould with cement/concrete mixture.
- Whilst filling, tap both sides of the mould top and bottom firmly when using rubber mallets to ensure that the cement mix properly fills all the cavities of mould. Note: This step is unnecessary when using a vibrating table.
- When the mould has been filled to the top give a final shake and tap. After a few moments the cement mix will settle in the mould. Top up with cement as necessary and smooth off the open end with a trowel. After a few minutes the cement mix will settle. This will leave a gap of 1 – 3mm between the mix and the top edge of the mould. This is part of the design of the brick and must NOT be “topped up”.
- Once the mould has been filled place on a level firm surface and leave to dry. Do not move the filled mould for at least 24 hours after filling. Movement will cause the plastic mould to flex and the filling may crack.
- Leave to cure for a minimum of 24 hours or preferably a minimum of 2 nights (In ambient temperatures below 16 degrees Celsius and above 3 degrees Celsius) before de-moulding. Block making should not be attempted if ambient temperature is below 5 degrees Celsius!
- To remove the block from the mould whilst standing on firm surface run the edge of small washer all around middle seam of the mould to loosen any cement mix. Then use the large washer in the middle of the seam at the top by twisting it to further loosen mould. Pull the first half of mould away by hand and knock the second half of the mould with rubber mallet’s handle end first through the bottom cavity and then followed by the top cavity. This will loosen the second half of the mould where after the mould is removed from block. Note: See rapid de-moulding video with air under videos tab.
- After removing the block from mould leave the block to stand for at least 21 days to ensure proper setting. At this stage the block can be left in open air/sun if necessary whilst curing.
STUMBELBLOC - A guide to building with STUMBELBLOC blocks
- Ideally, start on a level foundation. If not, you have to lay a mortar bed as in conventional building. However, this restricts you to only a few courses of blocks per day. On a level surface the foundation can be built using Stumbelbloc . They can be reinforced with steel rods and the cavities filled with concrete. Two courses of blocks are recommended for this and when completed an effective, strong “ring beam” is created.
- If the foundation cannot be built with Stumbelbloc i.e. bricks are used to create a floor slab. Usually, as a result of undulation or slope add 5mm per meter of the floor measurement to accommodate Stumbelbloc.
- Use then bed mortar (In South Africa Block Grip™ is recommended) and simply dip the bottom of each block into mortar. No mortar is required on the sides or the top.
- Always dry stack the first and the second course initially. This creates an equal gap on teeth of the block and sets the required tolerance. The second course should then be removed, dipped into the thin bed mortar and replaced. Ideally, the first course remains dry packed on the foundation. This eliminates cracking.
- Stumbelbloc builds in modules of 200 mm. Thus a standard full block is 400 mm and a half block is 200 mm. Construction distances should therefore be planned accordingly.
- When building pillars or openings, rotate the flat side of the block and half block for each level.
- Always build in one direction i.e. flat side of block always in same direction, on every level (Left hand or the right hand). Do not change the direction when going to a new level.
- To create bigger module door or window openings, fill hollow cavities with concrete and cut with a grinder to frame size. In areas without electricity, build the opening bigger than frame. Put hoop iron/bracing strap or wire on every second course and build up with brick castings.
-
To create lintels using Stumbelbloc:
a. Insert a soffit plank at the required opening and lay one course of blocks.
b. Chop off the centre teeth of blocks.
c. Lay 2 x 10 mm steel rods in horizontal cavities created on first course by removed top centred teeth.
d. Lay 2 x 10 mm steel rods in horizontal cavities created on second course by removed top centred teeth.
e. Complete building the blocks to wall plate height, fill cavities of all three courses including overhang of 200 mm per side of reveal with concrete.
f. Refer to Stumbelbloc building manual for steps from foundation to roof height.
- To fit the hoop iron/bracing strap to the wall before roof construction, press cement bag four courses down into the block cavity. Bend the hoop iron/bracing straps point similar to fish hook and anchor three and a half courses deep and fill cavity with concrete.
- It is not ideal to plaster the dwelling on the day of construction. Thin bed mortar should cure for a minimum of two days.
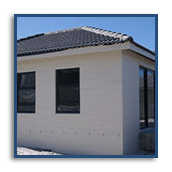
- Finished structures should be rendered or bagged externally with waterproof “Skim Plaster™” (Product of RSA) or standard plaster for coastal areas.
- Internal walls may be left bare or preferably plastered or bagged.